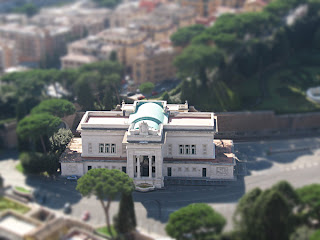
Tilt-shift filter effect produced with Photoshop
If you do not "accidentally" has a Tilf-shift lens for the camera, you can create the effect by your own hand. The method described applies to Adobe Photoshop, but should work similarly with other image editing programs. And here's how:
1. Scene Select
Is best to select from a photo in which an environment from a bird's eye view - has been recorded - so obliquely from above. Landscapes and city shots are particularly good, especially if also people and / or vehicles to be seen. Then it loads up the image in Photoshop to edit it.
2. Mask
It should be masked areas, which should not be blurred (blurred). To do this, simply press the key "Q" as a shortcut for masking. Now you select the Gradient tool (G key) for which the option ceases "Reflective History."
The image areas that are to remain sharp, can now be masked. For this one draws (with the Gradient tool), a vertical Linne on the image, the starting point of the line is the center of the gradient layer.
3. Blur
To create the miniature world effect, now the nichtmaskierten areas blurred, making them appear blurred and indistinct to be. To achieve this, click on the horizontal menu bar, select "Filter -> Blur -> Lens Blur." On the working window you can now play with the settings and try the effect as the best effect is achieved.
3. Contrast and color saturation
In order to give the image the final touch, you increase the contrast (eg on the value of 15 or more to taste), which lends the scene a higher plasticity. If one also increases the color saturation a bit, the pictures look even more like the plastic world of model railroading.
Tilt-shift effect with Photoshop Elements Filter
In Adobe Photoshop Elements unfortunately missing a few features that are present in the large version of Photoshop. Therefore, we must make do with a few other tools to generate the tilt-shift filter effect.
1. Mask
The masking takes over at the Photoshop Elements selection brush. One chooses one option as a brush and brush with soft edges, the sharpness to 0%. The brush must be chosen for soft edges extending so large that it can mask a train in the entire range. Be masked so the area to stay sharp.
Thereupon he turns to the masked area. These clicks are on the top horizontal menu bar "selection - reverse>". Now the area is automatically masked to be fuzzy or blurred.
Tip:
To use this method for Photoshop Elements, the tilt-shift filter effect one has the advantage that you can not only to mask a "rigid" horizontal range, but can choose an arbitrarily shaped surface. This area can be masked, for example, only a circle, an oval or a completely different shape may have. One may further objects that are in the foreground and thwart the mask area, excluding the selected area (eg trees).
2. Blur
The Blur is done in Photoshop Elements on the Gaussian blur filter, found on the top horizontal menu bar "Filter -> Gaussian Blur -> Blur" is reached.
With the controller you can now set the desired blur effect.
3. Contrast and color saturation
The rest - thus increasing the contrast and color saturation - you will of course also available in Photoshop Elements.
And even the miniature world-picture with the tilt-shift effect is finished - whether large Photoshop or Photoshop Elements.
No comments:
Post a Comment